Your first Java project finally runs from the command line and you want to share it with your friends to show the spectacular progress you made. All you need to do is to create a compressed jar file and send it to them, right? Not quite as in case they have no Java Runtime Environment (JRE) installed or have a different version from the one you used, all they will get is a cryptic error message.
If your friend is tech-savvy, he might be able to deal with the dependencies, but it is better if you do it yourself. You will have to learn eventually how to do it anyway.
In this article, we will create an installer for your Java project for Windows, so it can be easily distributed as any other software on the platform.
Prerequisites:
You need JRE installed on your Windows machine and a working .jar file. If you can run the jar file from the command line with the java -jar command, you will probably be able to create the installer too.
You will also need an icon for your program in the Windows ICO format.
If you just want to try the process, you can use my DvdAnimate project that will show the bouncing DVD logo on the screen. The .jar file was created with Java SE 11, that is the minimum version that you need to run the file or create the installer. Download the example jar and ico files here.
Step 1: Install the tools required
Two pieces of software need to be installed on your system:
- Launch4j will be used to convert your .jar file to an .exe.
- Inno Setup compiler will package the .exe and the JRE into an installer.
Step 2: Create an executable for Windows
Create a new folder for your project and place your jar and ico files inside. In the example this folder will be located at “C:\Projects\DvdAnimate”.

Create a sub-folder named “bin” and copy the JRE installation inside from wherever it is installed in your system. You will probably find it under “C:\Program Files\Java\”.
Rename the JRE folder to “jre”. In my case the original folder name was “jdk-14”. If you check the contents of “C:\Projects\DvdAnimate\bin\jre”, you should see the following contents:

Now it’s time to fire up Launch4j. You might have to install an older version of Java to run Launch4j, but that shouldn’t be a problem as multiple versions can be present on your system at the same time. For me, it broke the command line runnability of my jar file, but that can be easily fixed with setting the correct PATH variables in Windows.
Select your jar and ico file and set the name of the exe to be exported.

On the “Classpath” tab, select the main jar file of your project.

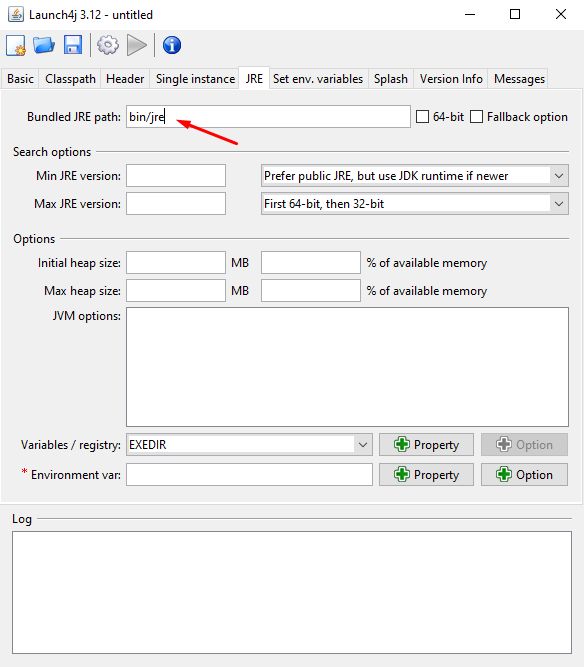
On the “JRE” tab set the Bundled JRE path to “bin/jre”.
Click on the cog icon to build the wrapper.

Select the location where Launch4j will save the project configuration. You can put this file into the same folder as the project.

If everything worked out, now you should have an exe in the project folder. Try double clicking it to see if it launches your program.

Unfortunately sending this exe to your peers will not work as it also requires the “bin” folder to be present for the runtime environment. This is why we will create an installer in the next step to package everything together.
Step 3: Create the installer
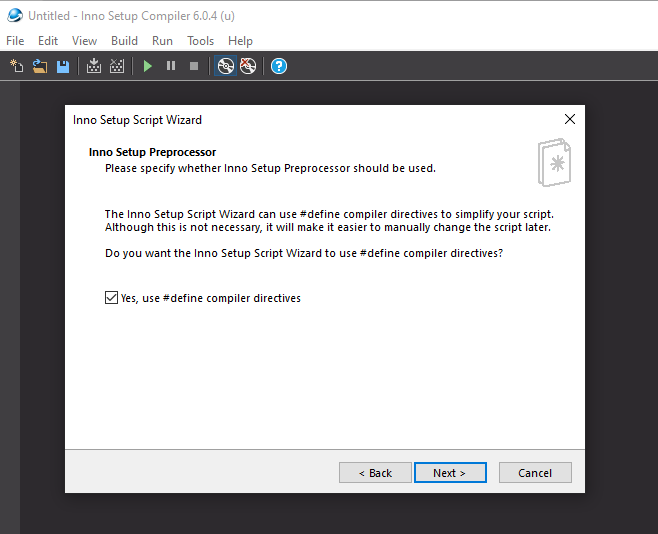
Launch the Inno Setup Compiler and choose “Create a new script file using the Script Wizard” option.

Click next…

Fill out the required fields to add some info about your program.

Just click next to go with the default installation location.

Select the main executable file and add the project folder with the “Add folder” button. When a window pops up if you want to add files in subfolders too, select yes.

On the next page click the bottom-most option to support previous windows version if you want to.

Skip the documentation options for now, but you will have to deal with these when you become a professional developer.

Go with the default option for now…

Select the languages that apply to you.

Select the output folder. In my case I choose the parent directory of my project.
You can also set the installer filename and icon here.

Go with the default setting on the next window.
Click “Finish” to finalize the compiler script.

Click “Yes” to start the script that will create the installer. You will be asked if you want to save the script, choose “Yes” if you think that you’ll need it later.

After quite a few minutes of waiting the script will create the installer file for you in the target directory:

Your Java project now can be installed like any other Windows software and if you don’t need it anymore, you can remove it just like any other windows application.
The only downside with this method is that as the installer contains the full JRE, the size of the .exe will be hundreds of megabytes larger than your original jar file.


Good evening, I want to ask if the script on the above page is to create and run the installer please, and thank you.
regards
Yes, the article is about that.
Very concise and to the point.
This is what i have been looking for as a starter.
Thanks a lot.
Write more on the same.