Zorin OS is an extremely clean, modern-looking Linux distribution based on Ubuntu. With the 4 different desktop layouts (with 4 more in the Pro version) it will be a familiar experience no matter if your last computer had Windows 7-10-11, macOS, ChromeOS. Version 16 based on Ubuntu 20.04.3 LTS just arrived a few weeks ago and you should really give it a try… and if you do, read on for some tips on how to make an awesome distro even better.
This article presumes that you installed Zorin OS 16 Core, which is the free version of Zorin OS based on the Gnome desktop. It comes with some kind of software preinstalled for all your basic needs, but if this is not your first rodeo you might consider choosing the Pro or Light version too. A comparison between the versions can be found on the download page.
1. Change the desktop layout
Choosing the desktop layout is part of the introductory slideshow the first time you log in, but if you want to change it later you can do it by launching the “Zorin Appearance” app.

In the Core version, you can choose between a Windows 10-like, a Windows Vista-like, a Chrome OS-like, and the default Gnome layout.
I like the Chrome OS-like “Touch” layout best, which is incidentally very similar to the default Windows 11 layout. I’m basically using it with a few tweaks as on a FullHD screen with a lot of icons the right side is overcrowded. To fix this I moved the “Desktop button” and the “Right box” to the left and set them both to stack to the left. I also disabled the “Activities button” as I’m not using that function much.

2. Set up dynamic theme and night light
Also in the Zorin Appearance app on the theme tab, you can choose to switch between the light and dark theme dynamically between sunrise and sundown. This is an extremely cool feature, I highly recommend trying it.

You should also try the built-in night light functionality which you can enable in the “Settings” app on the “Screens” tab.
3. Install the restricted extras
As a Ubuntu derivative, Zorin OS 16 lacks a few multimedia codecs and the Microsoft True Type fonts in the default install. Not sure if you need these, I often forget to add them myself nowadays and don’t really feel their absence anymore. A few years back this step was essential however as websites just didn’t render properly without the fonts. As a web developer, that was a big no-no at the time.
Well, just fire up the terminal, you still want them:
sudo apt install ubuntu-restricted-extras
4. Install Chrome or Chromium
You get a perfectly adequate web browser in the default install, but personally, I just like Chrome better. Been using it ever since 1.0 and it’s the focal point of my desktop with just the right amount of extensions that help optimize my workflow. I also like the simple built-in synchronization with my Google account even though I probably give out way more information about me than necessary.
Anyways, there is an open-source alternative called Chromium on which Chrome is built on top actually. If you are moderately privacy concerned maybe us that, but if privacy is really important to you, just stick to Firefox.
To install Google Chrome, download the 64-bit deb installer from https://www.google.com/chrome/ and open it to start the installation process.
To install Chromium, open up the “Software” app to find it on a graphical user interface. You can also install it from the command line with this command:
sudo snap install ungoogled-chromium
5. Install Nemo
Out of the box, Zorin OS comes with the standard Gnome file manager which could be perfectly enough if you never used a 2-panel file manager in your life. If you are old like me, you might want to have a bit more control and features, and believe me that at the moment your best choice is Nemo from the Linux Mint guys.
I’m using the 2-panel layout in list mode all the time, but you can even use tabs to complicate things more. I’m also using it to connect to remote servers after which I can easily open files and navigate remote directories inside Sublime Text.
To install Nemo, type this in the command line:
sudo apt install nemo
To make Nemo the default file manager for your desktop, run this command in the terminal:
xdg-mime default nemo.desktop inode/directory application/x-gnome-saved-search
6. Install VLC and/or SMplayer
Now that you have a better file manager, maybe you should get familiarized with some other “better” software. Let’s start with a video/music player.
Both VLC and SMplayer are well-known options for video playback and they are also available on other platforms too. Both boast being able to open any file format, but I like SMplayser more as it has always been lightning fast. Maybe try them both?
To install VLC type:
sudo apt install vlc
To install SMplayer type:
sudo apt install smplayer
7. Install Mailspring
Zorin OS comes preinstalled with Evolution, a powerful software suite with email, calendar, and contacts functionality. Try it and see if you like it but I myself prefer something cleaner, faster, fresher… like Mailspring. Been using it for years with my private and work Gmail addresses and my only complaint is that it can be a bit sluggish on an HDD. Otherwise, the user interface is very pretty and you can switch between multiple themes. The subscription version also offers advanced features that businesses will highly appreciate like read receipts and link tracking.
To install Mailspring use the default Zorin OS software tool. Open up the “Software” app and search for Mailspring.
8. Set default applications
Now that we have a few better alternatives than the default software selection, let’s make them the default applications.
Open up the “Settings” app and on the left side near the bottom choose the “Default applications” entry. Now you can change the default application for web browsing, email, or video playback.
9. Improve battery performance with tlp
TLP is a feature-rich command-line utility to save laptop battery power without getting too technical about it. It automatically takes care of most settings to extend your laptop’s time without a power outlet. Just install it and let it do the work.
To install tlp type this command in the terminal:
sudo apt install tlp tlp-rdw
To be frank, I was surprised to find that tlp was already present on my machine. Maybe it is part of Zorin OS 16?
Anyway, tlp should run automatically the next time you boot up your computer, but you can also manually start it with this command:
sudo tlp start
To check if it is running, type this into the terminal:
tlp-stat -s
10. Set up PIN unlock
If you used Windows 10 before, you will greatly appreciate that you can set up PIN unlock in Zorin OS too. To do so just follow the steps in my previous article here: https://randomblog.hu/setting-up-pin-unlock-for-ubuntu-linux/
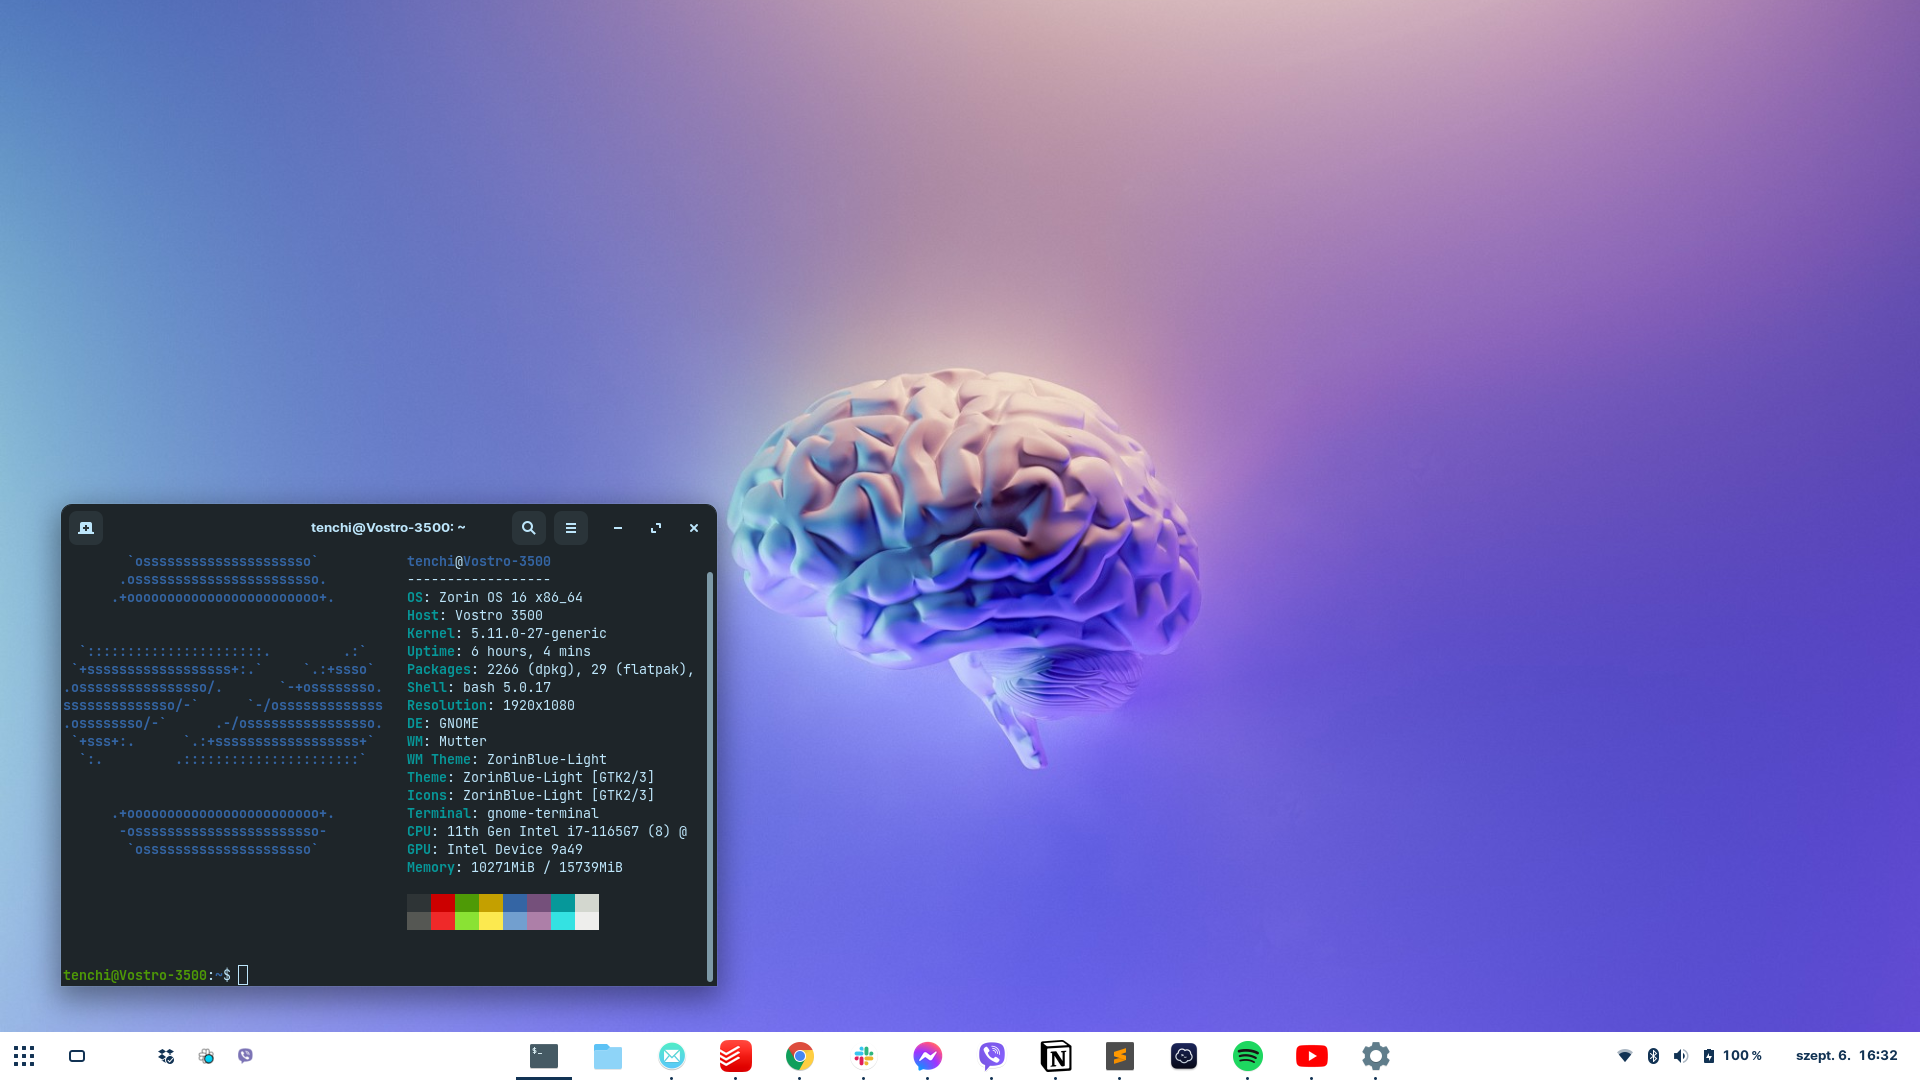
11. Install Neofetch and tell everyone you use Zorin OS 16!
Neofetch is a command-line system information tool that displays information about your operating system, software and hardware in an aesthetic and visually pleasing way. The goal is to share screenshots of your desktop with Neofetch visible to brag about your setup.
To install neofetch, type this into the terminal:
sudo apt install neofetch
To run neofetch, type “neofetch” into the terminal, make a nice screenshot and spam everyone you know with it 🙂